Overview
Overview
Phishing-Reporter
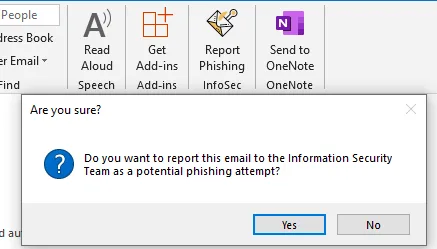
An Outlook Plugin to report phishing emails easier and provides full integration with GoPhish.
Screenshots


Write-up and Guide
https://www.0d.ae/report-phishing-plugin-for-outlook
If you plan to use the plugin, please fill the 3 Questions survey
Features
- Auto-deletes suspecious emails once reported.
- Append [POTENTIAL PHISH] to subject for automatic Outlook rules.
- Extract and list the most important information in the report email such as email headers, URLs/Ips, domains, attachments hashes, sender details.
- Removes hyperlinks from suspecious links. (https:// becomes https[:]// and so on).
- Attaches original email to the report for further investigation.
- Full integration with the Open Source Phishing Framework, GoPhish. Now you can see who reported a simulated phishing email sent by your information security team.
- Two buttons for easy reporting. One in the
Homemenu. The second when you right-click an email. - Reports any bugs to a seperate support email without annoying the users.
- Installer-ready: fast compile to EXE file, as all hassles were tackled already. Just follow the guide.
Before you start:
:warning: Verify that you have Microsoft Visual Studio Installer Projects component installed in Visual Studio. You can install it by going to Tools -> Get Tools and Features
:warning: Make sure you build the project's installer with the right TargetPlatform for your Office. If you have Office 32-bit installed, then compile the project as 32-bit. If you have Office 64-bit, then compile the project as 64-bit. You can do so by choosing Installer -> (from "Properties" menu) TargetPlatform -> x86 or x64
How-to Guide:
Note: I used Visual Studio 2017 with .NET Framework 4.8 to compile it. The plugin was tested on Outlook 2019 (x64).
- Download the project and extract it.
- Double click
PhishingReporter.slnto open the project using Visual Studio. - From the top menu, if it is on
Debugmode, change configuration toRelease. - In the right menu, Open
Settings.settingsand go toSettingsTab. - From there, change:
- infosec_email: to your information security team.
- gophish_url: GoPhish instance IP/URL, if you didn't host any, you can leave the default value. The plugin will still work.
- gophish_listener_port: The port number of GoPhish listener.
- support_email: Support email to auto-report any bugs. Should be for a teammate who maintains the plugin code.
- Save the file.
- Build the project. From the top menu
Build→Build PhishingReporter. - In the right menu, Click
Installerand change what you prefer onPropertiesMenu, I recommend to change:- Manufacturer, ManufacturerUrl, SupportPhone, SupportUrl
- Generate a new UpgradeCode by clicking the
...button thenNew Code.
- [Optional] If you want to change the installation wizard splash screen:
- Open
splash.psdfile using Photoshop, and design the splash screen you like. - Export the design by overwriting
splash.jpgfile in the main project directory.
- Open
- At the end, right-click
Installerand chooseBuild. - The installer file should be located in
PhishingReporter\Installer\Releasefolder.
Integration with GoPhish:
This was tested with GoPhish v0.12.1 Windows version (download link)
- Download GoPhish and modify phishing server
listen_urlin config.json file.

- Run GoPhish server.

- In the project source code, Open
Settings.settingsand go toSettingsTab. - Modify
gophish_urlandgophish_listener_portto match the values in Step #1. - Take note of
gophish_custom_header

- Build the project and compile the installer.
- In GoPhish portal, while setting up the Sending Profile, add the custom header from Step #5 with the value
{{.RId}}and click Save Profile.

- Create a campaign and test the plugin's report feature.
Credits
- Abdulla Albreiki
- Reused some code from NotifySecurity project by Nicolas Chaussard